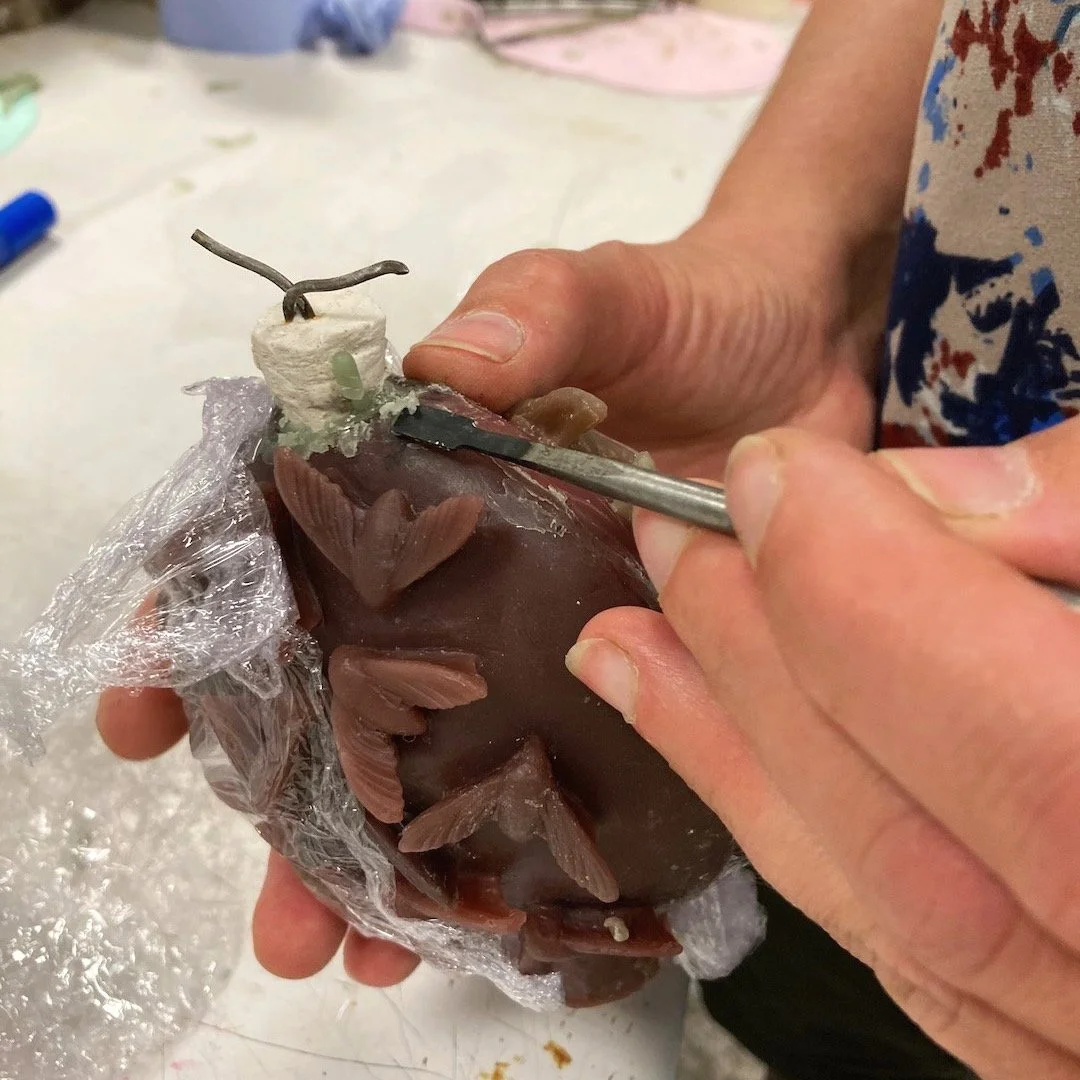
kiln preparation, day 1
Angela and I have two days to get my work ready for the kiln.
Our year is split into three repeated learning blocks, so we are both hoping that this first one will be the most ‘clumsy’ and next time I should know a bit more, make better preparations and all in all, do more without Angela, meaning that we can really make the most efficient use of our sessions together.
I have made the appropriate jacket moulds, and have tried to prepare as much as possible, because time is so tight.
So, on this first morning, Angela and I looked at each of the four pieces I am hoping to get into the kiln. We’ve named them for easy reference, Moths and Moon, Honeysuckle, Bees and Blossom, and Hedgerow.
Straight away, I realized I had made a couple of my moulds ‘upside down’ in that it would have been easier to make wax ‘slip casts’ or wax skins from them if the pouring hole had been on the other end of the model. One of those things for me to put into the brain bank for next time.
CORES
Three of the four designs have cores ( voids in the final object ) that needed to be poured in refractory (kiln) plaster. Because I have designed bottle shapes, like large scale old perfume bottles with narrow necks for fancy stoppers, this makes the cores a bit tricky. These refractory cores need wire armatures/supports made from nichrome wire. This is the same wire in kiln elements.
Some of my silicone moulds were fairly flimsy thixotropic skins. Thixotropic is an additive, like an extra thickener or catalyst, that allows silicone to be spread on an object, rather than being a pouring liquid. Anyway, it meant that some of the moulds needed to be pinned closed, then the join sealed with hot wax. I watched Angela do these, and I’ve since done it myself, and OMG she made it look easy! I was making growling noises by the time I finished mine. Nothing more anger making than shoving pins into yourself!
The cores need to have wires in them, (with the ends free) and also a ‘key’ of extra plaster, that keeps the core in position in the outer refractory plaster. The core resting all its weight upside down, ( on a thin neck in this case ) needs to be firmly held in the outer plaster. Weirdly, the outer plaster never truly bonds to the head/key of the core. Even after firing, they come apart quite easily.
The cores were poured, and left to set while we looked at my outer wax models.
My Hedgerow pot, was the only piece that didn't need a separate core making. The opening at the neck is wide enough for the refractory plaster to be poured inside and out, in one go.
It's also a piece where I had made the mould ‘upside down’ or at least it would have been helpful if I had made the pouring hole for the other end. Because of this, cutting a lot of wax away at the neck, tidying it up, etc took time. I was especially glad of Angela's skills here. I'm good at making a pleasing curve or detail, but levels, perfect symmetry etc, grr. I get there, but it's always a battle.
The base was thickened up with one pour of wax, then a second pour of wax, up to the brim, was allowed to cool and form a skin to build up the walls, then poured away. Ceramicists will be familiar with making slip castings like this.
Wax skins.
Again, because of a literal bottle neck in my designs, my cores can't just be dangled inside my wax outer shapes, and the gap filled with wax. The wax outers need either to be ripped away until the core can be placed inside, or the wax needs to be made in two halves.
To make my Honeysuckle design, with a patterned surface I didn't want to try to remake the pattern in the sticky, and to me, (compared with my carving wax), imprecise casting wax - blaming my tools? ; - ) The best method was to paint liquid wax in the open jacket mould. The first layer being hot wax, using a brush, to pick up the surface detail, then more sludgy, cooler wax layers until I had two shells, like an easter egg.
My Moth and Moon design was already in two halves, so the inner core was placed, the edges joined, and wax poured into the cavity.
By the end of our first day, I trotted home with successful cores, wrapped in plenty of clingfilm to keep them from drying out and Moth and Hedgerow for finishing off. Quite a lot of homework, and a busy, happy brain full of new knowledge!


